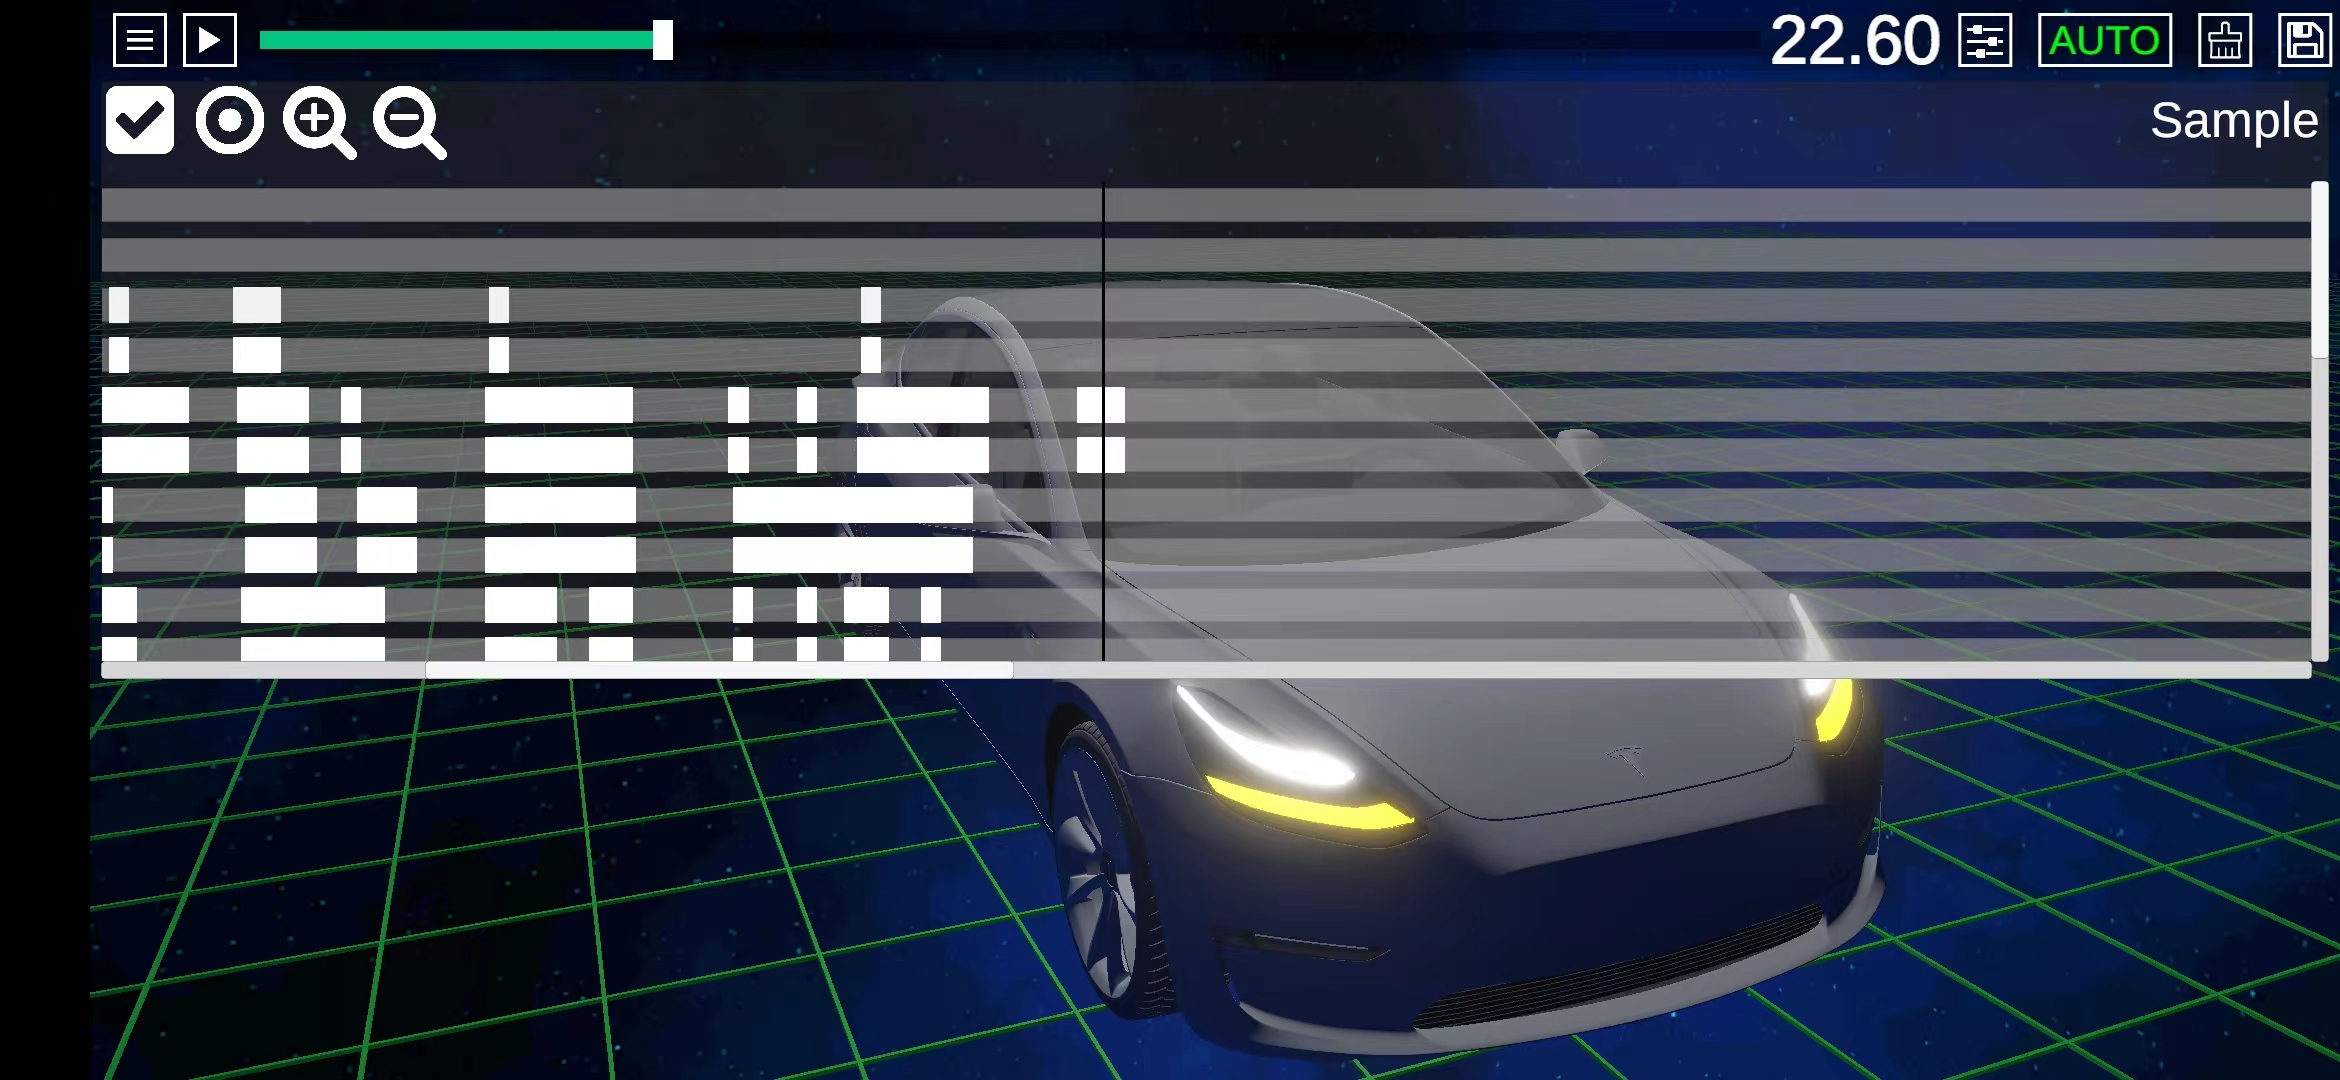
Light Show Creator这个APP已经上架一段时间,有用户反馈说,自动模式虽然好用,但是手动模式更加适合手机平台。于是我在新版本里添加了手动模式的规划。

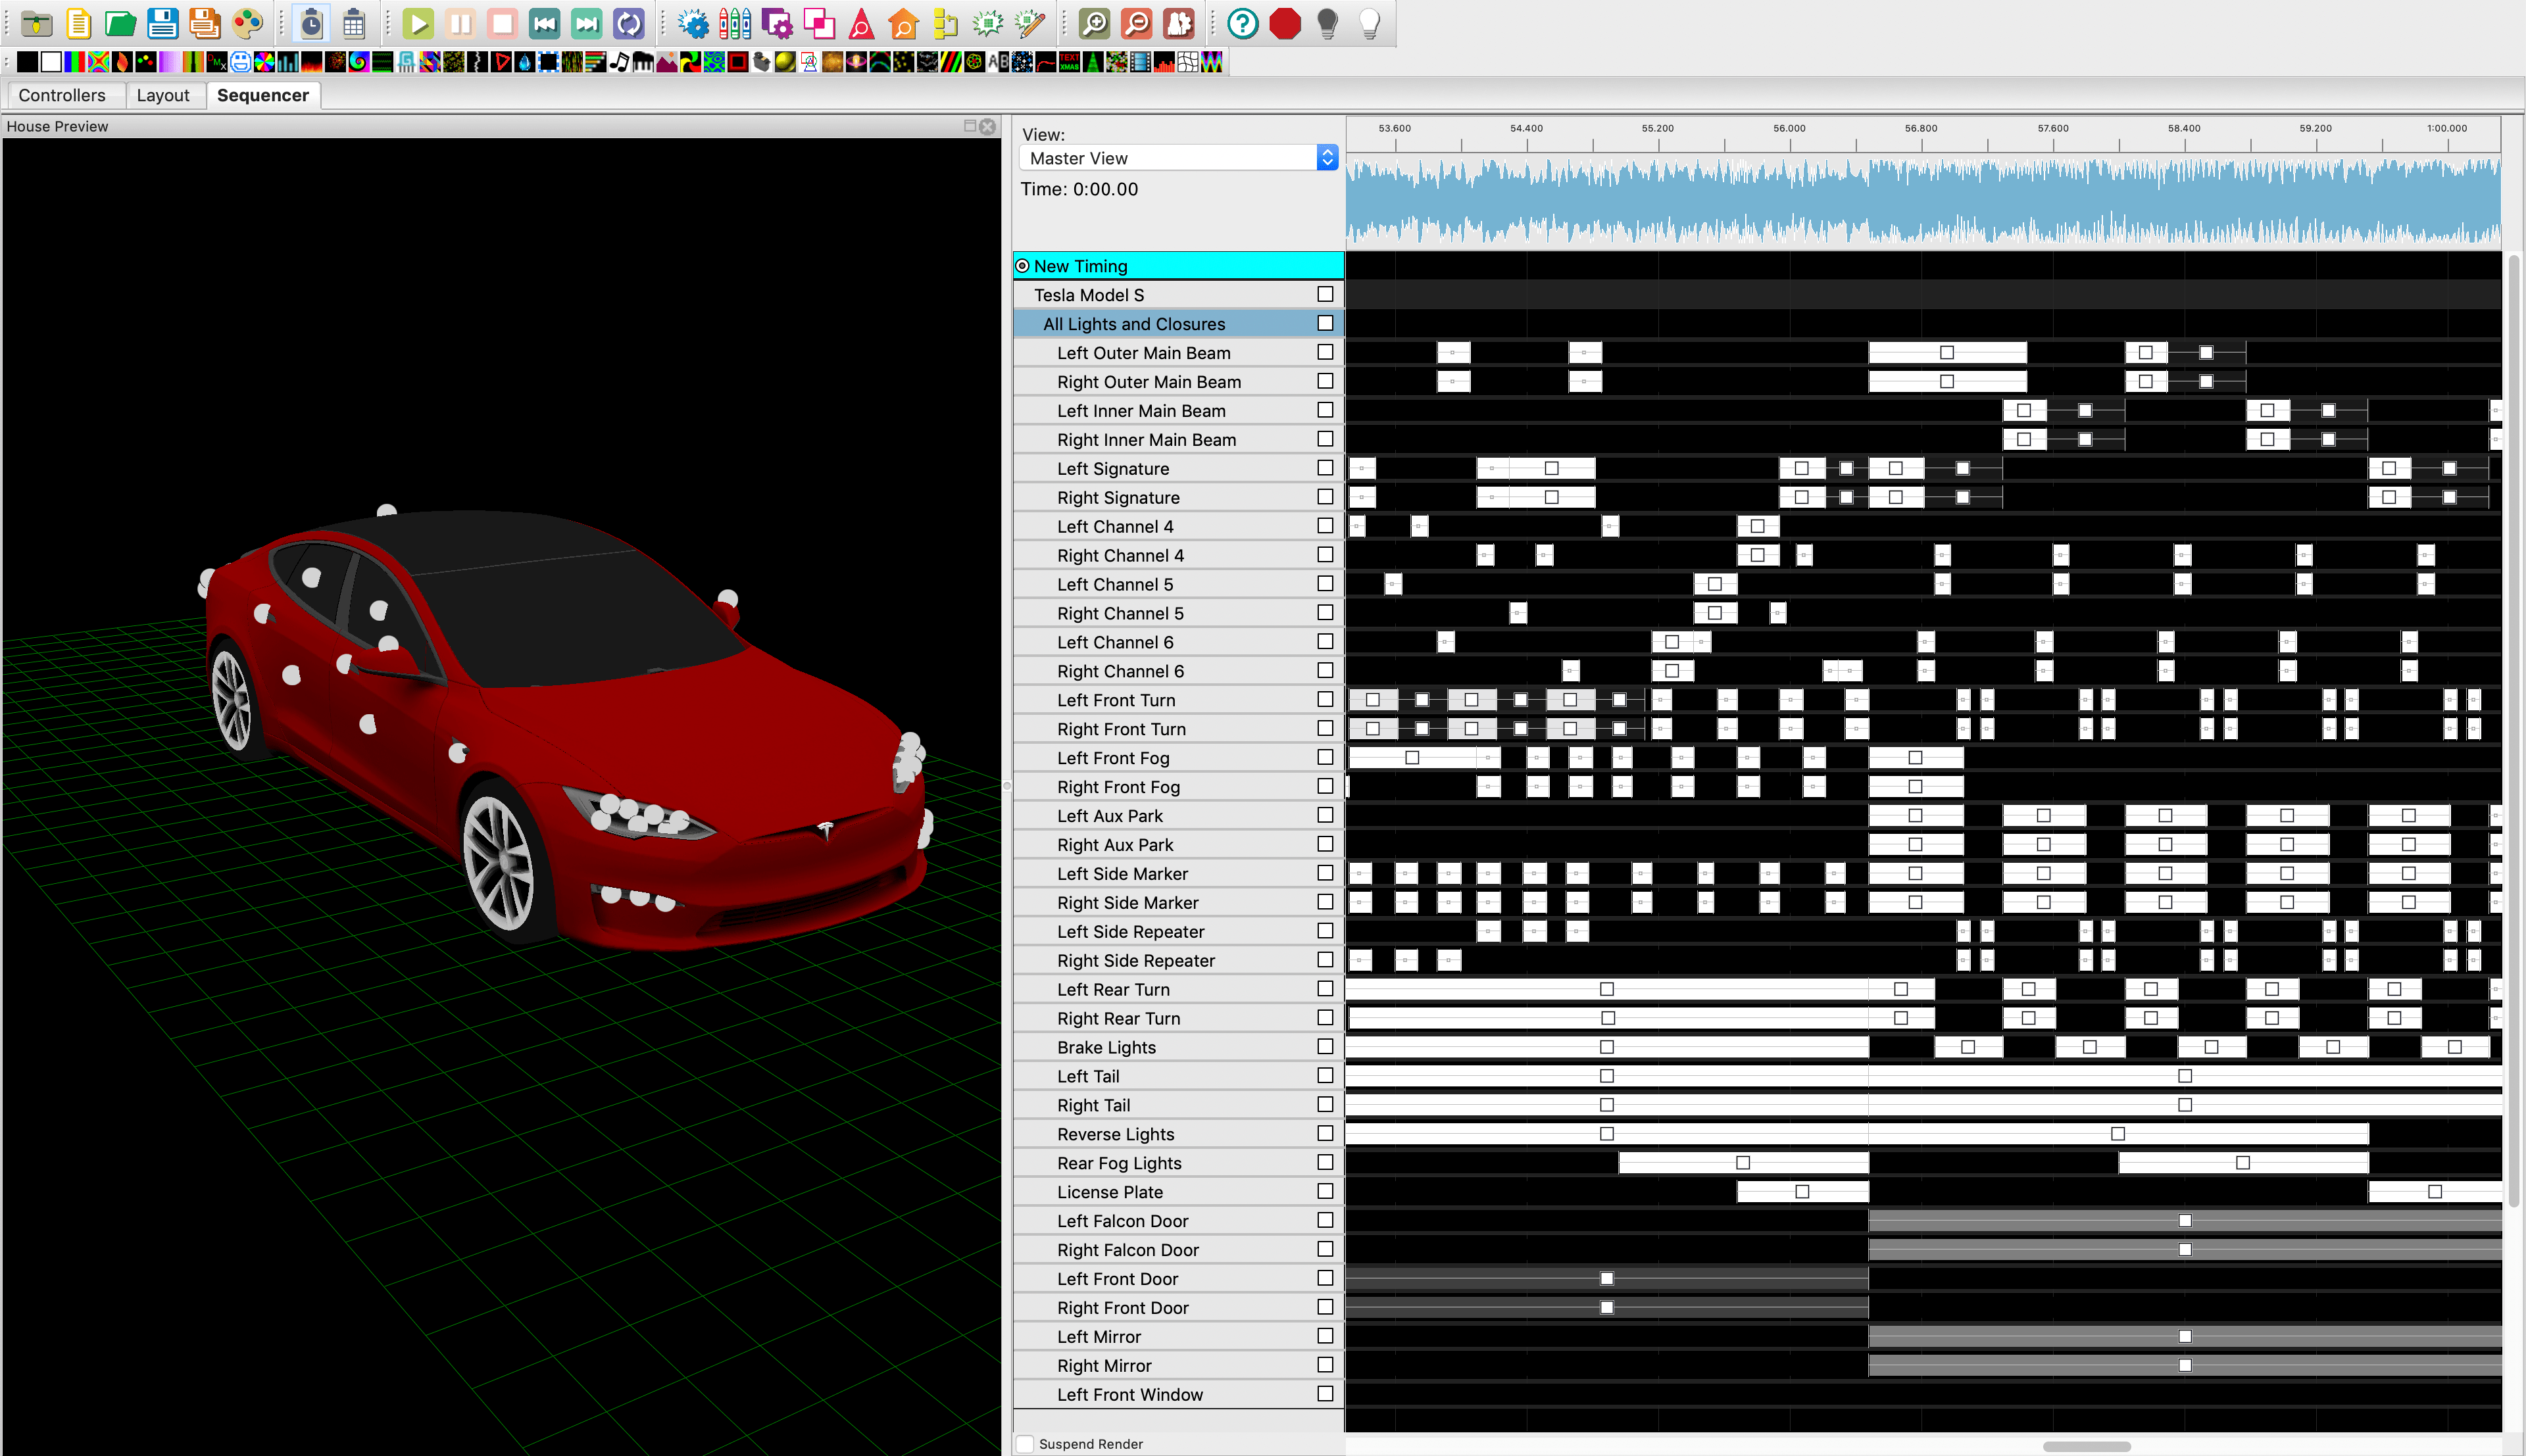
其实在最早的版本,是有手动模式的,实现的原理跟xLights类似,都是通过时间轴来进行编辑。结果做出来效果很不理想,时间轴的控制更加精细,更适合用鼠标的控制,而不适合触摸屏。所以我在第一个正式版本抛弃了手动模式,只保留了自动模式。

旧版本
旧版本很难用

我最近看到了一个钢琴类APP,受到了一点启发,我可以把控制车灯的方式改为类似钢琴的键盘,按下灯亮,松手灯灭。可以单独控制一边的车灯,也可以按黑键同时激活两边的车灯。

在手动录制的同时,也可以激活自动模式,只需要自己控制关键的几个车灯即可。

nginx做http代理的默认配置对请求包体大小有限制1M以内,如果超过个值会返回413错误码,及Request Entity Too Large这些的错误信息。修改一下nginx的配置即可:

http {
...
#上传文件的大小限制 默认1m
client_max_body_size 8m;
...
}

从windows直接拷贝文件到linux/macos可能会出现行尾留下”^M”符号,git diff可见到,是因为windows的换行使用的是\r\n两个字符。

1. 安装dos2unix

Ubuntu/Debian:

sudo apt-get install dos2unix

Centos:

sudo yum install dos2unix

MacOS

阅读全文 »

腾讯云的Ubuntu使用apt安装软件会报找不到源

Err:1 http://mirrors.tencentyun.com/ubuntu bionic/main amd64 m4 amd64 1.4.18-1
Something wicked happened resolving 'mirrors.tencentyun.com:http' (-5 - No address associated with hostname)
Ign:2 http://mirrors.tencentyun.com/ubuntu bionic/main amd64 autoconf all 2.69-11
Ign:3 http://mirrors.tencentyun.com/ubuntu bionic/main amd64 autotools-dev all 20180224.1
Ign:4 http://mirrors.tencentyun.com/ubuntu bionic/main amd64 automake all 1:1.15.1-3ubuntu2
Err:2 http://mirrors.tencentyun.com/ubuntu bionic/main amd64 autoconf all 2.69-11
Something wicked happened resolving 'mirrors.tencentyun.com:http' (-5 - No address associated with hostname)
Err:3 http://mirrors.tencentyun.com/ubuntu bionic/main amd64 autotools-dev all 20180224.1
Something wicked happened resolving 'mirrors.tencentyun.com:http' (-5 - No address associated with hostname)
Err:4 http://mirrors.tencentyun.com/ubuntu bionic/main amd64 automake all 1:1.15.1-3ubuntu2
Something wicked happened resolving 'mirrors.tencentyun.com:http' (-5 - No address associated with hostname)
E: Failed to fetch http://mirrors.tencentyun.com/ubuntu/pool/main/m/m4/m4_1.4.18-1_amd64.deb Something wicked happened resolving 'mirrors.tencentyun.com:http' (-5 - No address associated with hostname)
E: Failed to fetch http://mirrors.tencentyun.com/ubuntu/pool/main/a/autoconf/autoconf_2.69-11_all.deb Something wicked happened resolving 'mirrors.tencentyun.com:http' (-5 - No address associated with hostname)
E: Failed to fetch http://mirrors.tencentyun.com/ubuntu/pool/main/a/autotools-dev/autotools-dev_20180224.1_all.deb Something wicked happened resolving 'mirrors.tencentyun.com:http' (-5 - No address associated with hostname)
E: Failed to fetch http://mirrors.tencentyun.com/ubuntu/pool/main/a/automake-1.15/automake_1.15.1-3ubuntu2_all.deb Something wicked happened resolving 'mirrors.tencentyun.com:http' (-5 - No address associated with hostname)
E: Unable to fetch some archives, maybe run apt-get update or try with --fix-missing?

看着应该是mirrors.tencentyun.com挂了,都ping不通,更换源就好了:

0.1. 首先备份源列表

sudo cp /etc/apt/sources.list /etc/apt/sources.list.bk

0.2. 修改sources.list文件

sudo vi /etc/apt/sources.list
阅读全文 »

最近在尝试给APP引入账号第三方SDK,再三比较,如果是出海的APP,Firebase是不二选择。

接入的过程中比较坎坷,分别尝试了AS导出aar包到unity,还有从unity导出AS工程,都以失败告终(IOS还未尝试)。

其实是根本就是我没仔细阅读官方文档,google官方有提供unitypackage,将其导入unity并在后台做简单设置即可。

官方文档:https://firebase.google.com/docs/auth/unity/start

0.1. 在Firebase后台注册应用


(注意,注册的时的包名要跟应用的最终包名一致)

0.2. 在应用设置中添加SHA证书指纹

阅读全文 »

Unity在引入最新版本Firebase发现报错:

Could not determine the dependencies of task ':launcher:lintVitalRelease'.
> This project uses AndroidX dependencies, but the 'android.useAndroidX' property is not enabled. Set this property to true in the gradle.properties file and retry.
The following AndroidX dependencies are detected: androidx.fragment:fragment:1.0.0, androidx.slidingpanelayout:slidingpanelayout:1.0.0,

大致意思是项目依赖了AndroidX,但是android.useAndroidX没有enabled

解决方案:

BuildSettings->Player->Publishing Settings 勾选Custom Gradle Properties Template。之后unity会自动生模板配置 Assets/Plugins/Android/gradleTemplate.properties
在properties文件中添加以下两行:

android.useAndroidX=true
android.enableJetifier=true

修改之后:

阅读全文 »

安卓手机从Android11开始支持无线调试,终于可以抛弃数据线了。

0.1. 先决条件

  • Android 手机需要是 Android 11 以上系统;
  • 电脑上的 Android SDK 工具需要 ≥ 30.0.0 版本,确认方式是:adb –version

0.2. 使用配对码配对

  • 手机上启用开发者模式 -> USB 调试 -> 启用无线调试选项
  • 点击无线调试 –> 点击使用配对码配对设备 可以看到配对码、ip 和端口号
  • 在电脑上的终端终端运行 adb pair ipaddr:port
  • 输入 adb devices -l 即可看到通过无线连接成功的设备

0.3. 使用二维码配对

  • 手机上启用开发者模式 -> USB 调试 -> 启用无线调试选项
  • 点击扫码配对,在Android stuido设备菜单,选择Pair Devices Using WiFi
阅读全文 »

特斯拉在2021年的圣诞更新中,推出了全系灯光秀(LightShow)功能,灯光秀除了车内默认的版本,还可以自定义模式。我当时也第一时间尝试了下,但觉得太难编辑了,于是就有了新想法。

1. Idea来源

特斯拉官方推荐的一款开源软件叫:xLights,这是一款专业的编辑灯光表演的软件,导入特斯拉提供的模板和音乐,即可开始编辑自己的灯光秀。

xLights的编辑过程比较繁琐,需要一帧一帧的去编辑,而且编辑完还得运行个脚本来检查生成的文件是否合法,因为特斯拉对灯光序列有严格的限制,也是以防车灯被烧坏。整个过程费时又费力,我就在想,有没有办法简化这个过程呢,最好是能导入音乐就能一键生成。于是我萌发了开发一个APP的想法。

2. 前期准备

第一步,也是最重要的一步,我需要分析这个项目的可行性,也就是说我是否能够生成跟xLight一样的规范的fseq序列帧文件以供车辆识别,这个文件是二进制的,需要逐个字节去分析它的含义。

通过特斯拉官方提供的检查脚本,我们可以大致反推出fseq格式的基本含义,由前半部分的头定义和后半部分序列帧(每个车灯的开关/亮度)组成。

阅读全文 »

通过特斯拉引荐码下单的车辆在交付后,可以获取特斯拉商城3500积分,可用于兑换750km超充里程及其它周边产品

打开老车主的特斯拉引荐码通过官网自己下单

https://www.tesla.cn/referral/ovlt77625

也可以扫码获取

如果是通过销售下单的,提车前邀请码发给销售即可: ovlt77625

当你提车之后,即可在特斯拉APP里查看到积分。

阅读全文 »